Don't worry, maybe it's not that bad. First of all, you can determine whether your iPhone or iPad can't turn on because the battery has been used up. If this is the case that we can't turn on, please connect your iPhone or iPad to the power supply. If you see the sign on the screen and the battery is low, the battery is out of power. Then you can try to turn on after the device has been charged for a while. It seems that your device has consumed all of its power just because it upgrades the system.
If you are sure your current phone battery is full, but it doesn't work properly, there may be a problem with your iOS system. So how do we fix iPhone or iPad under the circumstance?

Note: after using this function, your iPhone/iPad will be updated to the latest iOS version. And if your iPhone/iPad has been jailbroken, then it will be updated to non-jailbroken version. If you have unlocked your iPhone/iPad before, then it will be re-locked again.


Step 1. Run the dr.fone toolkit and Connect iPhone/iPad to computer
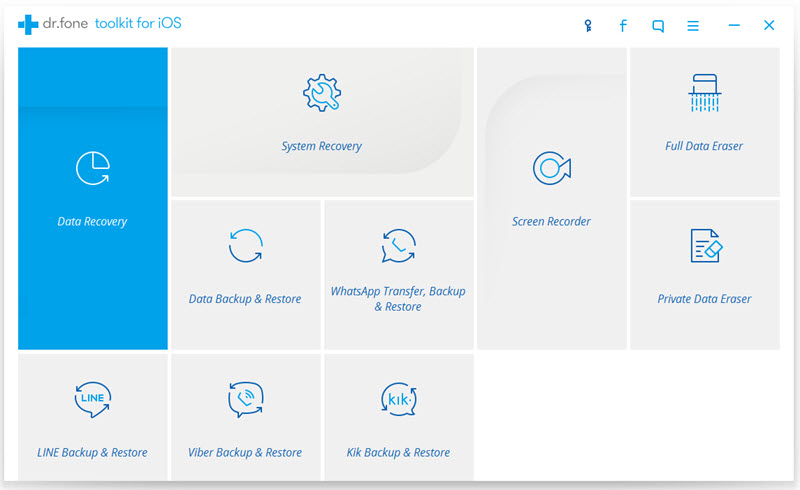
First of all, please download the dr.fone toolkit and run it on your computer. Then, choose System Recovery from the main window.
Next, use an USB cable to connect iPhone/iPad to computer. At this point, the program will recognize your iPhone/iPad and you need click "Start" when device identification is successful.
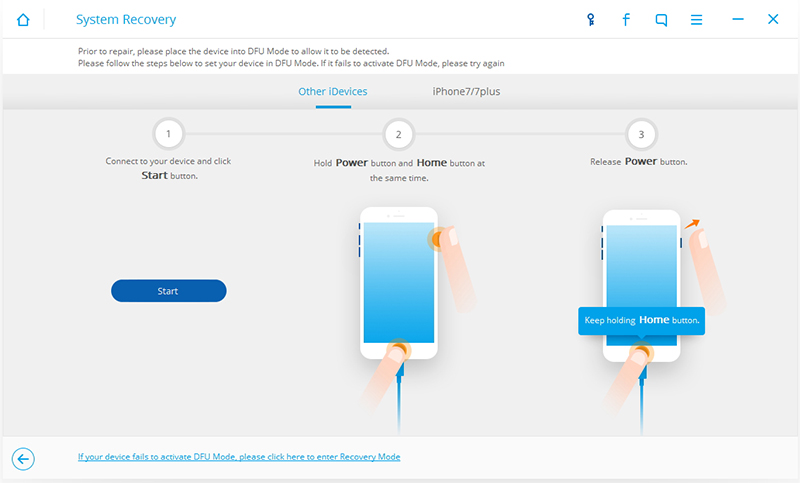
Step 2. Boot your iPhone/iPad in DFU mode
Now, you see the instructions as shown in the figure below. You need to manually operate your iPhone/iPad so that they can go into DFU mode.
The concrete steps are as follows:
Please hold the Home button and Power button for about 10 seconds, then release the Power button and still hold the Home button.
After the iPhone/iPad is in DFU mode, program will automatically detect it. Then you can release the Home button.
Step 3. Select and download the firmware
When you are in the DFU mode state, you will enter a new window. You need to choose the right firmware to download. So you need to select the correct device model and firmware information. After confirmation, click "Download".
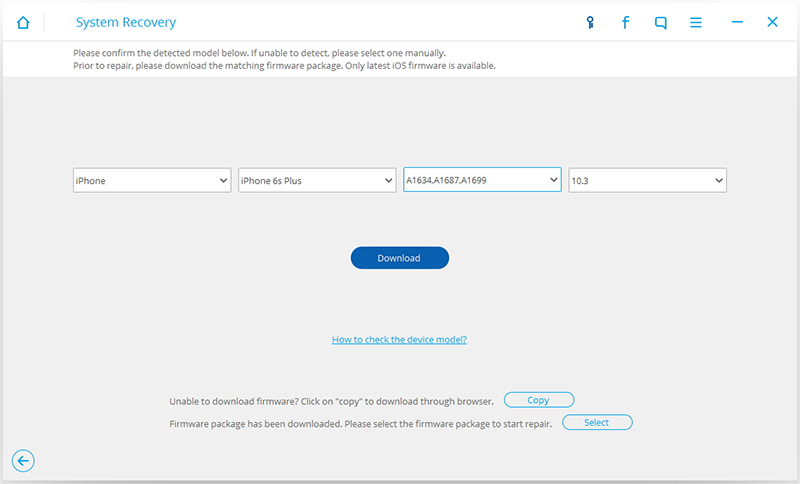
When firmware starts downloading, please be patient because firmware is large. Also, please keep your device in a stable network state.
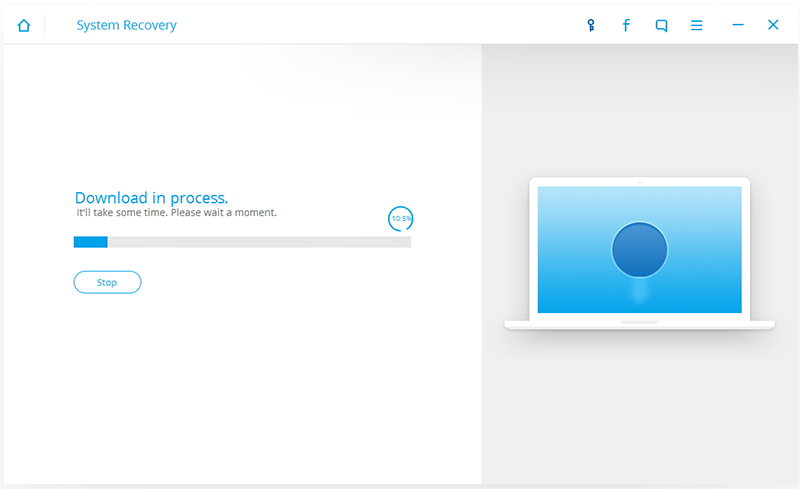
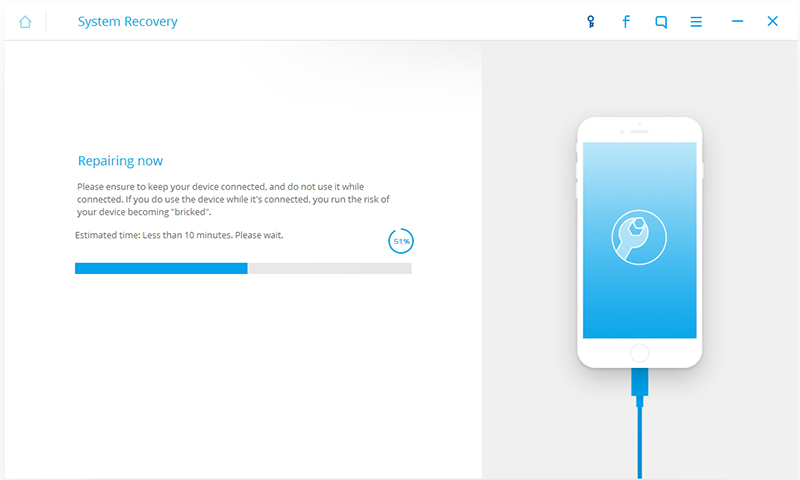
Step 4. Fix iPhone/iPad to normal status
When the firmware download is complete, the program begins to automatically fix your iPhone/iPad. And your device will work again. When this repair process is complete, the iPhone/iPad will go into normal mode. If it does not boot normally, you can click on Try Again to try the process again.

More info:
Repair iOS System Issues, Fix iOS System to Normal on iPhone
repair samsung in regina
ReplyDeleteSounds Good,
ReplyDeleteI was facing some issue when i tried to update my iPhone and iOS was corrupted. This blog is very helpful for me. Thanks for sharing this wonderful information.
We have an experienced team to repair your damaged device. Fix your device at lowest cost and in 30 minutes.
ReplyDelete